創建靈活的NFT(第2部分)
第2部分
第1步:製作新的netlify項目
我們通過在與其餘代碼相同的文件夾中創建一個網頁來開始第2部分。
touch ./index.html && echo "hello world : )" > ./index.html
太棒了,這是一個美麗的網站我們將它部署到互聯網上。創建一個git repo,提交你的代碼,並推送到原點:
git add . && git commit -m 'new website' && git push -u origin master
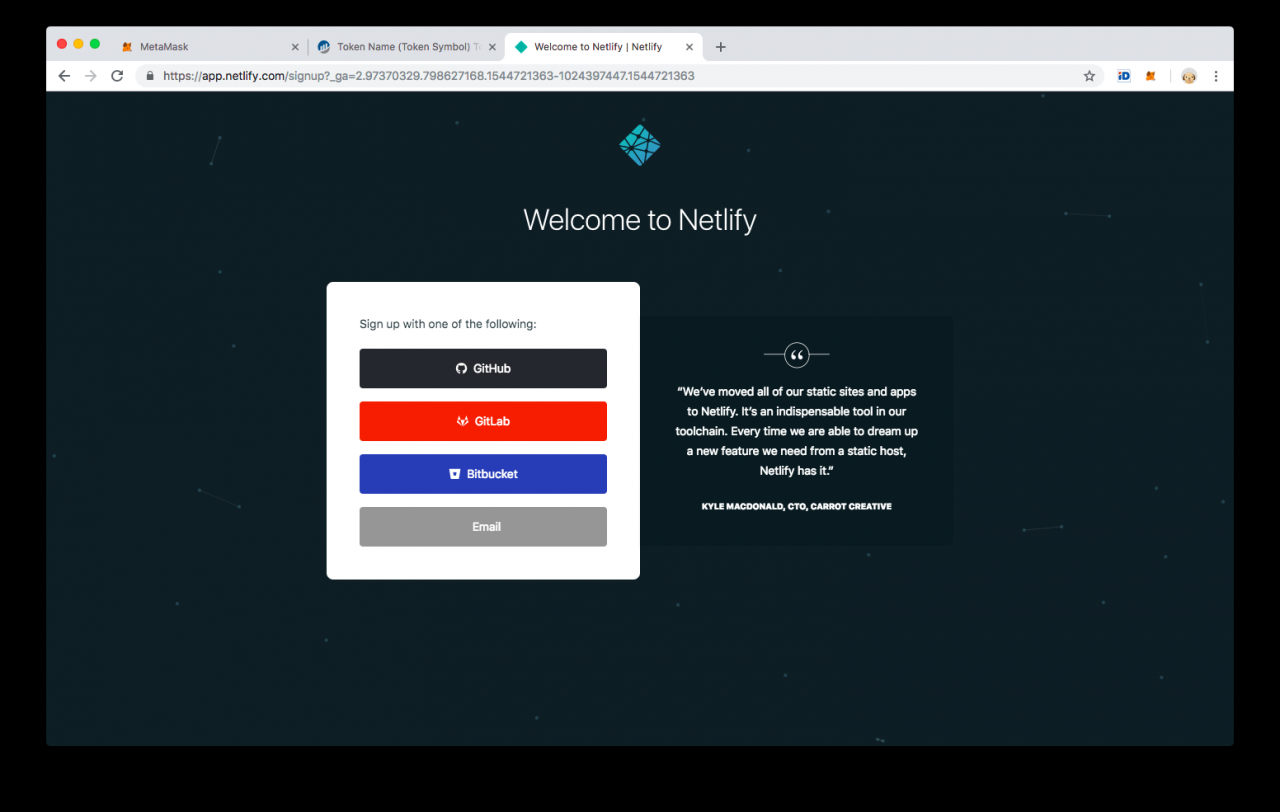
我使用netlify進行託管,因為它們有一個一體化的軟體包,用於從存儲庫部署站點,運行構建過程,為自定義域添加SSL以及添加lambda函數的能力。他們還有身份驗證和表單處理,但我從未使用過這些功能。您可以使用AWS或Google firebase。訪問netlify.com並使用您的github / gitlab / bitbucket帳戶註冊。
我們正在創建一個API端點,它返回NFT的元數據。我知道你在想什麼,「這不是一個邪惡的中心化解決方案嗎?」。是的。為什麼?因為替代方案仍然很糟糕。直到我們生活在一個我可以預期我的IPFS文件在我停止播種之後仍然存在的世界,以及我不必永遠等待內容的地方,我們必須使用當前的互聯網基礎設施。如果你看看任何成功的NFT項目,他們都在做同樣的事情。最大的NFT市場opensea.io緩存了他們可以找到並直接提供的所有NFT數據。這是因為它比依靠去中心化的解決方案更好。當去中心化解決方案可行時,我們的NFT將具有可升級的元數據端點
回到netlify,我們允許他們對我們的倉庫進行API訪問,以便他們可以部署更改。
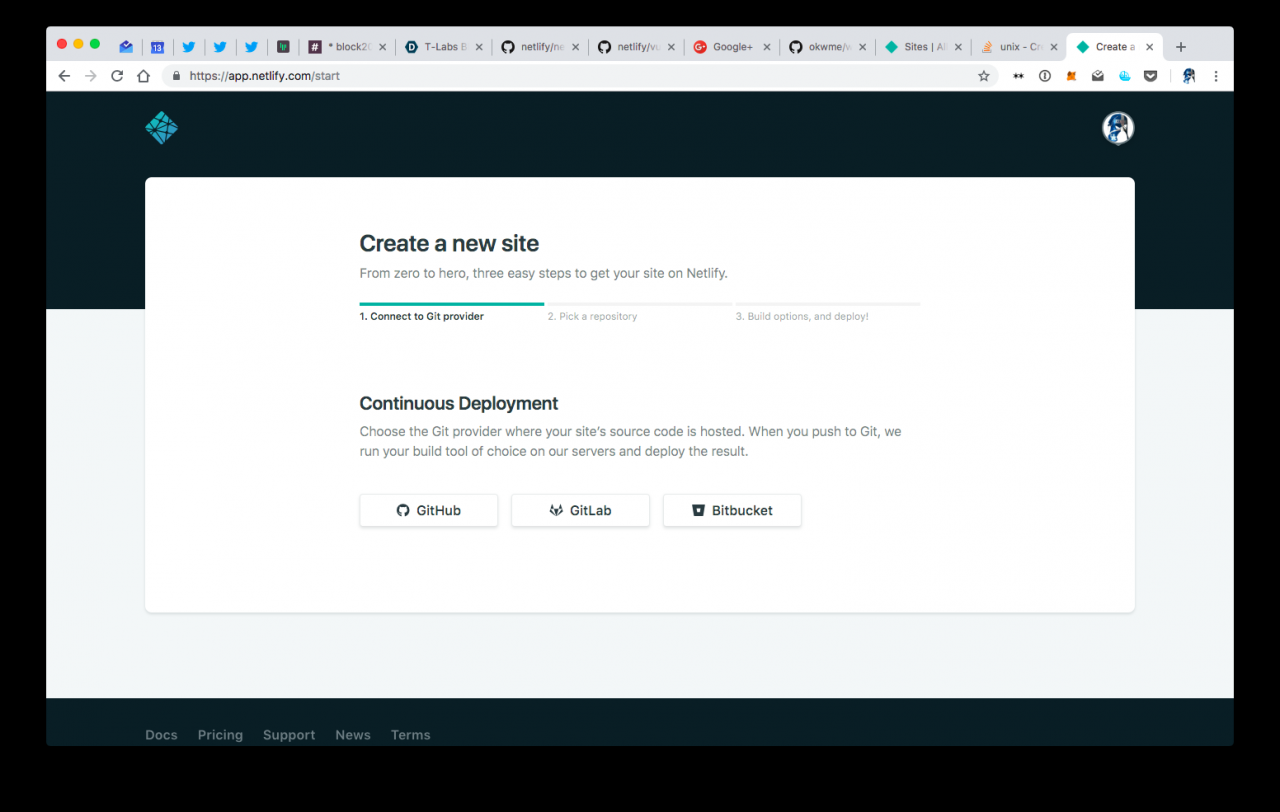
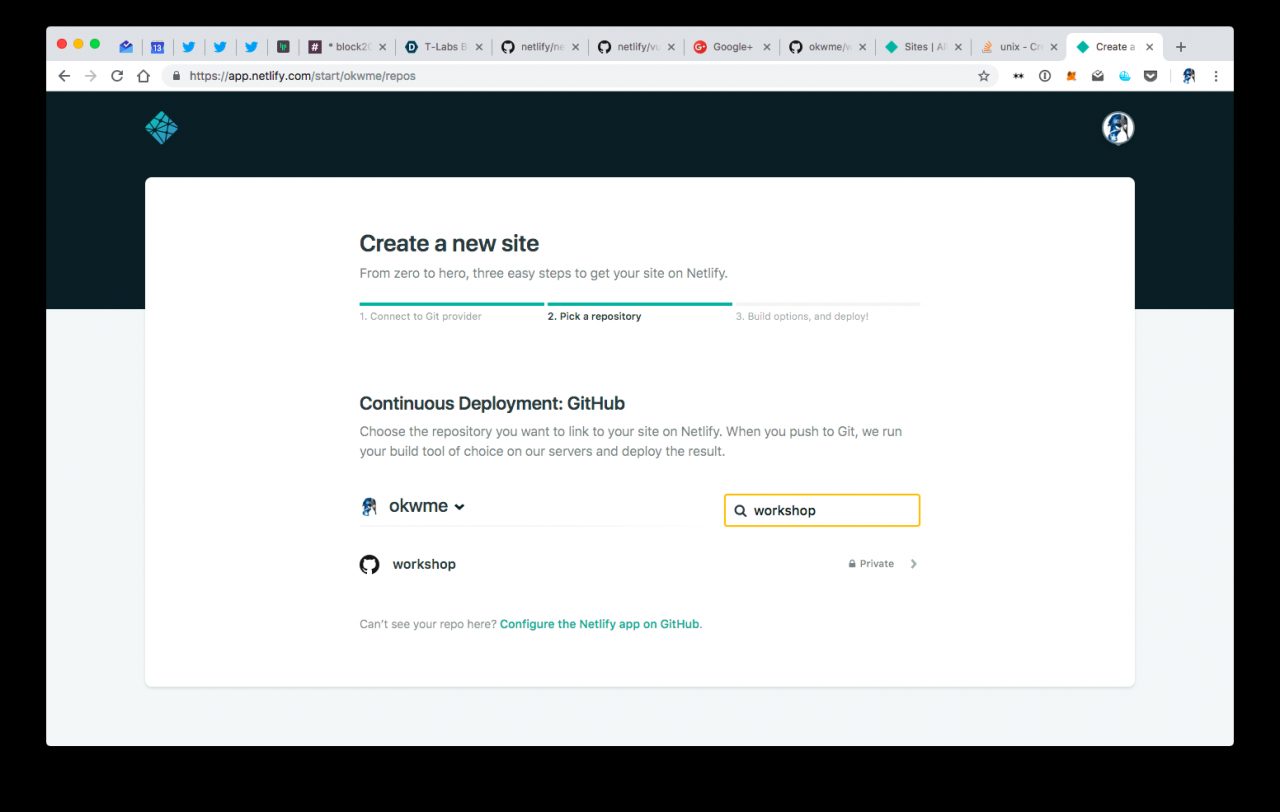
找到我們的回購併選擇它。
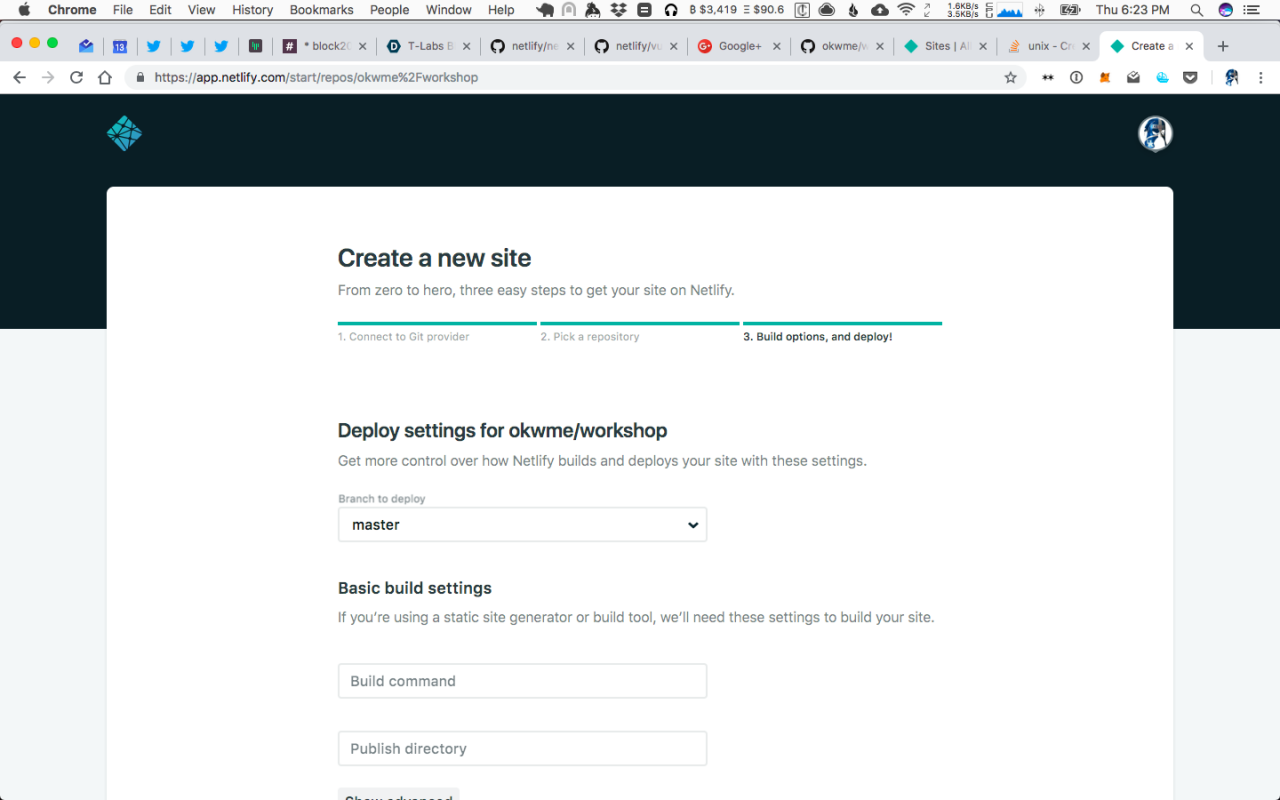
我們不需要添加構建命令或發布目錄,因為我們的網站只是一個index.html文件,它位於項目根目錄中。您可能已經在master分支上,因此無需更改(儘管netlify可以根據需要自動部署新域上的每個分支)。然後單擊「部署站點」。
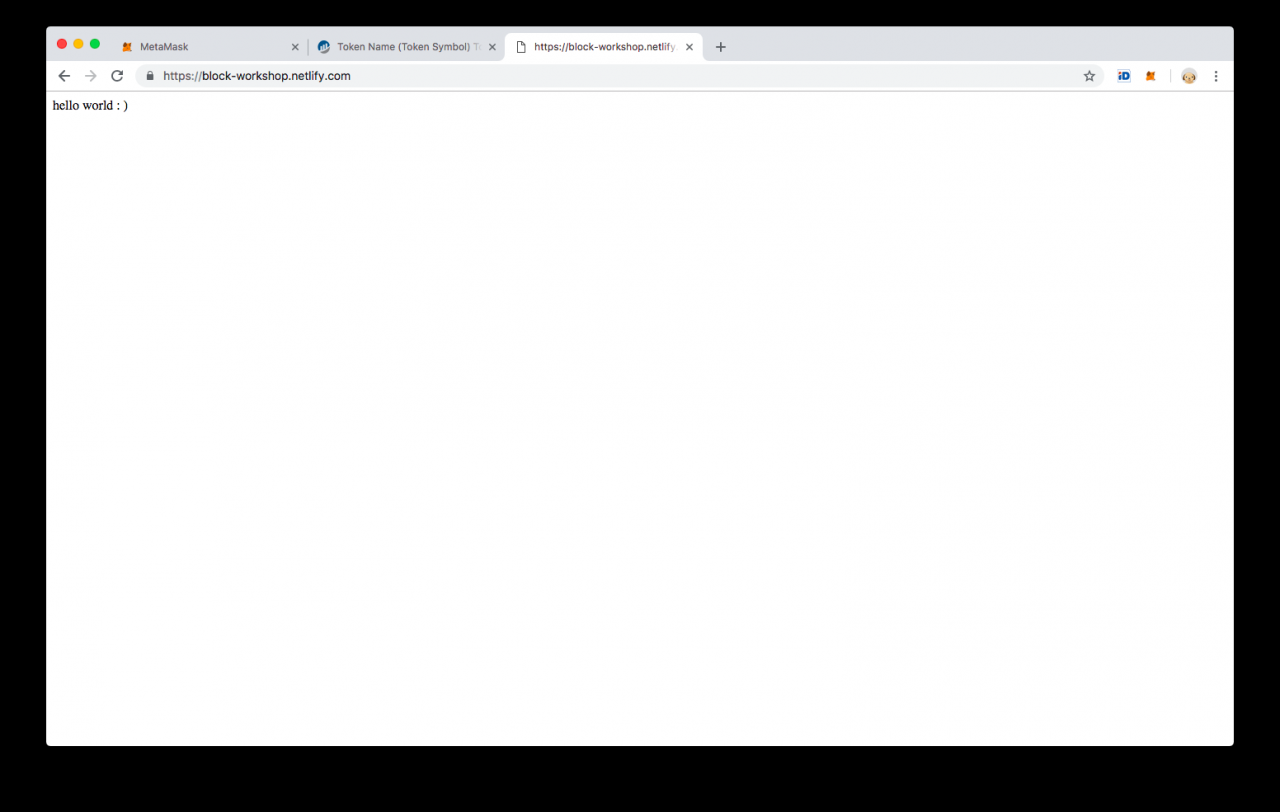
如果要從自動生成的名稱更改站點名稱,請單擊「 站點設置」,然後向下滾動到「 更改站點名稱」。我將我改為「block-workshop」,一旦部署過程完成,就可以在https://block-workshop.netlify.com上找到它。
如果一切順利,你應該看到這個美麗的網站:
第2步:安裝netlify lambda
安裝netlify-lambda為dev依賴項,以便我們可以訪問它npx。這是一個用於構建lambda函數並在本地提供它的實用程序,因此您可以在部署它們之前測試函數。
yarn add netlify-lambda -D
# or
npm install netlify-lambda --save-dev
添加lambda函數所在的目錄。稱之為lambda,因為這是有道理的。
mkdir lambda
為netlify 創建配置.toml文件,以定義我們的函數的服務位置:
touch netlify.toml
現在將密鑰添加functions到toml文件中,該文件是在netlify-lambda構建它們之後提供函數的位置:
[build]
  functions = "functions"
在lambda文件夾中創建一個虛函數:
touch ./lambda/helloworld.js
添加netlify從其文檔中提供的樣板:
exports.handler = function(event, context, callback) {
  callback(null, {
    statusCode: 200,
    body: "Hello, World"
  });
};
該文件導出一個名為的函數handler。這與AWS用於其lambda函數的格式相同(因為netlify是AWS的盤點器)。如果您使用了AWS的lambda函數,則可以將其與netlify一起使用,如果您有關於這些函數的高級問題請求,請在查詢中添加「AWS」而不是「netlify」。
運行本地伺服器,以便我們可以使用該netlify-lambda實用程序測試端點:
$npx netlify-lambda serve lambda
netlify-lambda: Starting server
Lambda server is listening on 9000
Hash: 47a70dc1b032c7c81a89
Version: webpack 4.27.1
Time: 745ms
Built at: 2018-12-13 18:52:53
        Asset      Size  Chunks             Chunk Names
helloworld.js  1.03 KiB       0  [emitted]  helloworld
Entrypoint helloworld = helloworld.js
[0] ./helloworld.js 129 bytes {0} [built]
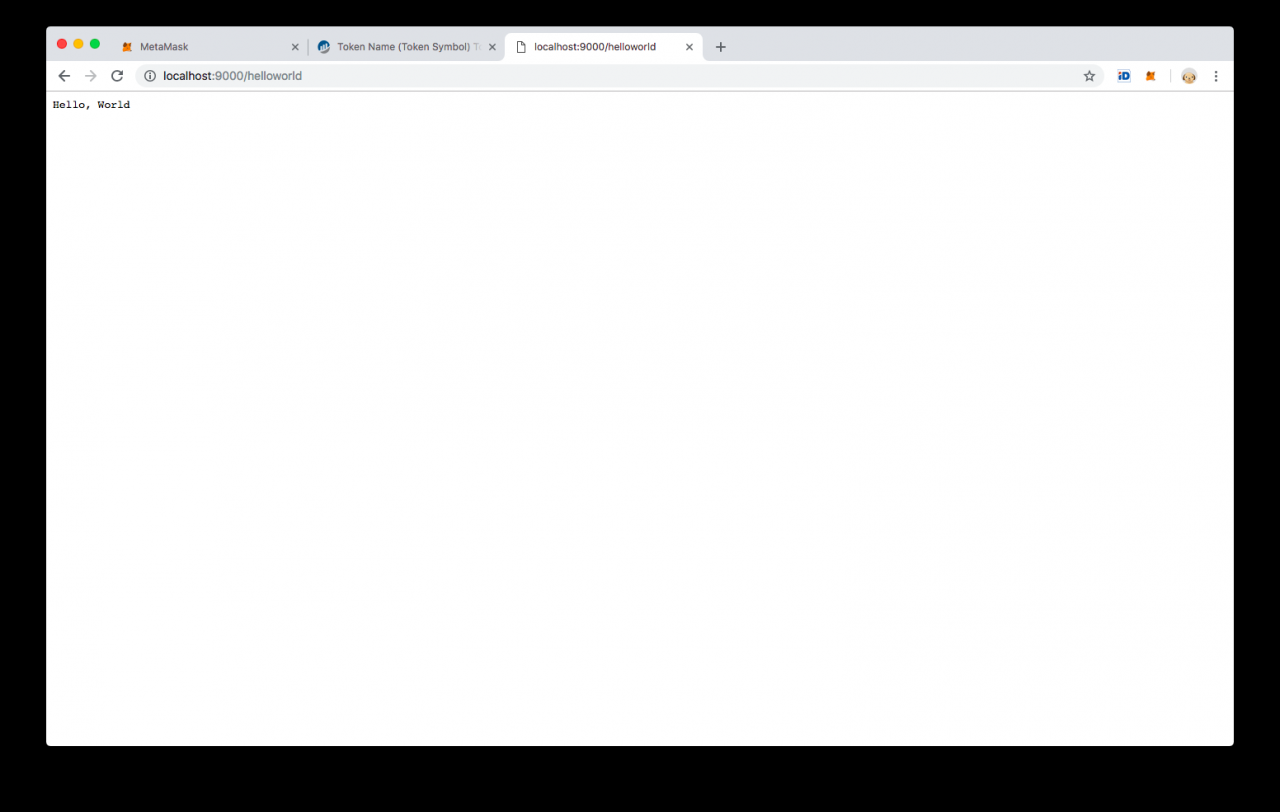
這將構建一個新的函數文件夾,其中編譯和提供helloworld.js文件。它可以從埠訪問9000,默認情況下可以訪問http://localhost:9000/helloworld
提交您的代碼並推送到您的倉庫。Netlify應該注意到推送master和自動部署它。
git add . && git commit -m 'Step 2: Install netlify lambda' && git push
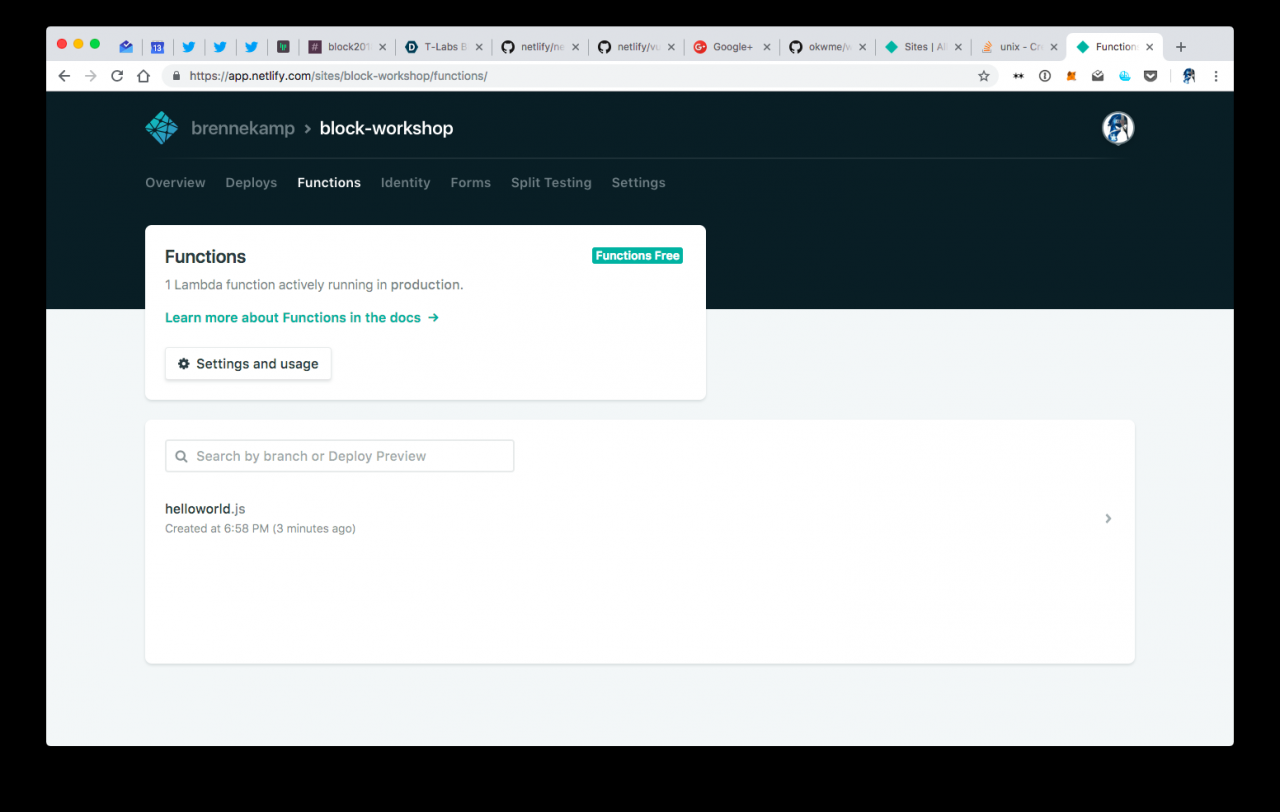
您現在可以訪問netlify上的函數部分,其中您有一個helloworld函數
部署完成後,您應該可以通過https:// {SITE_NAME} .netlify.com / .netlify / functions / helloworld訪問它
這是函數的已部署格式,因此您的當前路由沒有任何名稱衝突。這是不方便的語法,我們將在稍後的步驟中將代理規則添加到元數據端點。
第3步:添加元數據
現在我們已經創建了一個虛擬端點,讓我們創建一個更有用的端點。在lambda目錄中創建一個名為metadata.js的新文件,並使用之前的hello world代碼填充它。(或複製helloworld.js文件):
cp ./lambda/helloworld.js ./lambda/metadata.js
現在花點時間閱讀helloworld.js文件:
exports.handler = function(event, context, callback) {
  callback(null, {
    statusCode: 200,
    body: "Hello, World"
  });
};
處理函數有3個參數:
event這是觸發該功能的事件context這是事件的背景callback它結束請求並用內容和標題信息填充它。
我們處理對令牌元數據的請求,這些請求遵循我們在Metadata.sol合約中構建的格式。這意味著它是一個GET請求,其中包含內置於URL路由中的令牌ID,例如https://domain.com/metadata/{tokenId}。要傳遞GET參數,我們使用類似的格式https://domain.com/metadata?tokenId={tokenId}。我們可以定義我們tokenURI遵循這樣的格式,但這很難看。
讓我們現在使用這種格式,稍後進行改進。我們記錄事件以查看是否可以找到tokenId傳遞給URL 的參數。這在我們的本地設置中更容易,因此請遵循URL模式http://localhost:9000/metadata?tokenId=666
將一些console.logs 添加到metadata.js處理函數中,以便我們可以讀取這些參數中發生的情況:
exports.handler = function(event, context, callback) {
  console.log("EVENT", event)
  console.log("CONTEXT", context)
  callback(null, {
    statusCode: 200,
    body: "Hello, World"
  });
};
重新啟動該netlify-lambda實用程序(如果它仍在運行)並訪問該URL:
npx netlify-lambda serve lambda
如果您檢查控制台運行的伺服器,你看到的內容event,並context和tokenId下queryStringParameters:
$npx netlify-lambda serve lambda
netlify-lambda: Starting server
Lambda server is listening on 9000
Hash: 6507b49ec95292f0e68a
Version: webpack 4.27.1
Time: 665ms
Built at: 2018-12-13 19:18:56
        Asset      Size  Chunks             Chunk Names
helloworld.js  1.03 KiB       0  [emitted]  helloworld
  metadata.js  1.08 KiB       1  [emitted]  metadata
Entrypoint helloworld = helloworld.js
Entrypoint metadata = metadata.js
[0] ./helloworld.js 129 bytes {0} [built]
[1] ./metadata.js 195 bytes {1} [built]
Request from ::1: GET /metadata?tokenId=666
EVENT { path: '/metadata',
  httpMethod: 'GET',
  queryStringParameters: { tokenId: '666' },
  headers:
   { host: 'localhost:9000',
     connection: 'keep-alive',
     'cache-control': 'max-age=0',
     'upgrade-insecure-requests': '1',
     'user-agent': 'Mozilla/5.0 (Macintosh; Intel Mac OS X 10_12_6) AppleWebKit/537.36 (KHTML, like Gecko) Chrome/70.0.3538.110 Safari/537.36',
     accept: 'text/html,application/xhtml+xml,application/xml;q=0.9,image/webp,image/apng,*/*;q=0.8',
     'accept-encoding': 'gzip, deflate, br',
     'accept-language': 'en-US,en;q=0.9' },
  body: 'W29iamVjdCBPYmplY3Rd',
  isBase64Encoded: true }
CONTEXT {}
Response with status 200 in 8 ms.
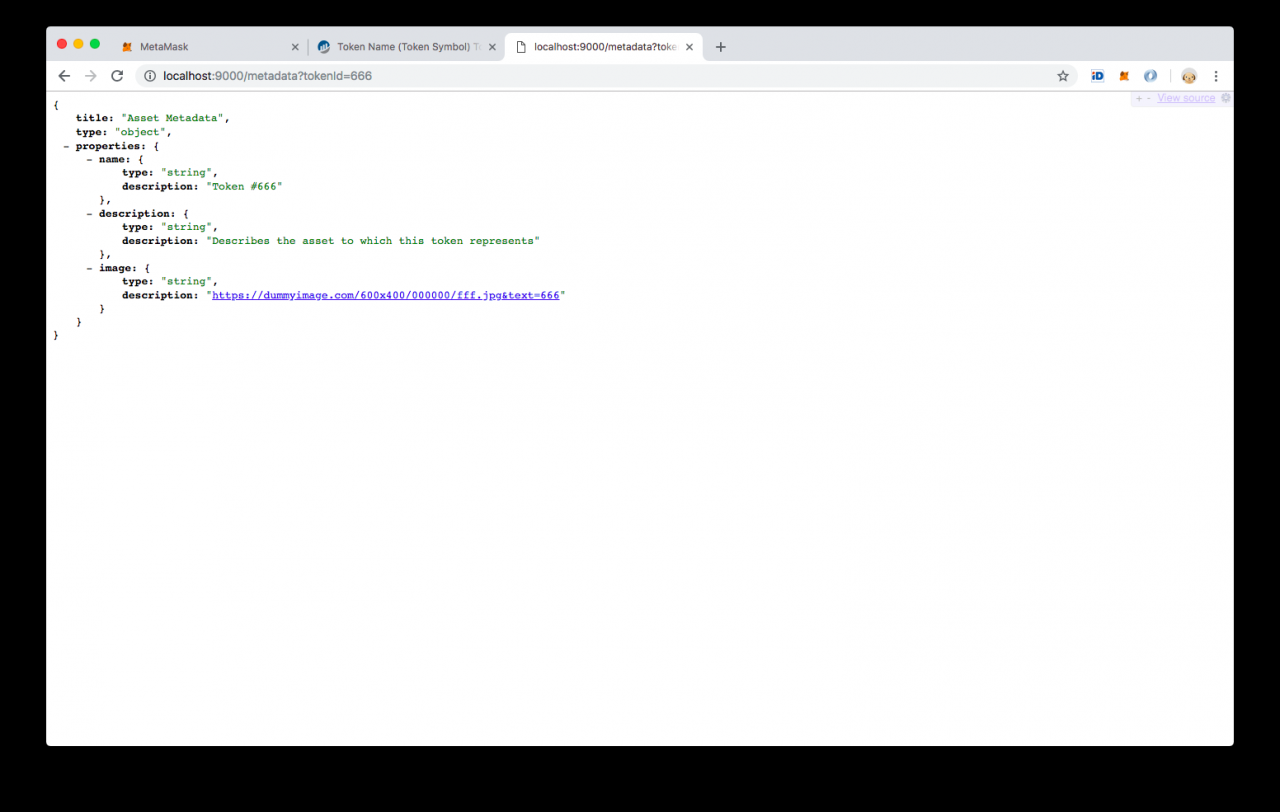
為了符合EIP-721和EIP-1047,令牌元數據JSON模式應遵循以下格式:
{
    "title": "Asset Metadata",
    "type": "object",
    "properties": {
        "name": {
            "type": "string",
            "description": "Identifies the asset to which this token represents",
        },
        "description": {
            "type": "string",
            "description": "Describes the asset to which this token represents",
        },
        "image": {
            "type": "string",
            "description": "A URI pointing to a resource with mime type image/* representing the asset to which this token represents. Consider making any images at a width between 320 and 1080 pixels and aspect ratio between 1.91:1 and 4:5 inclusive.",
        }
    }
}
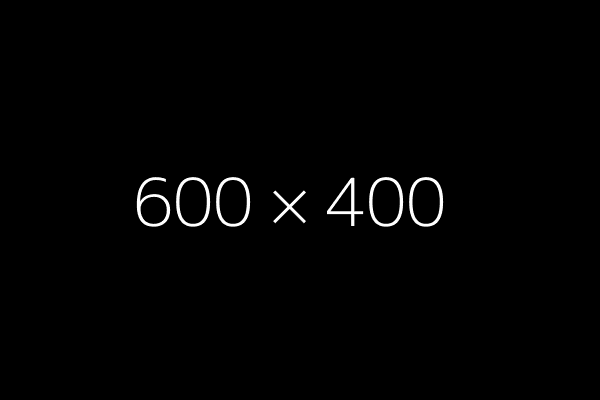
讓我們嘗試返回這個,但是用名稱替換名稱tokenId,然後返回一個自動生成的圖像https://dummyimage.com/600x400/000000/fff/&text=test%20image。
const tokenId = event.queryStringParameters.tokenId
const metadata =  {
    "name": "Token #" + tokenId,
    "description": "Describes the asset to which this token represents",
    "image": "https://dummyimage.com/600x400/000000/fff/&text=token%20" + tokenId,
}
在callback函數中返回它,並在返回之前對JSON對象進行字元串化:
callback(null, {
    statusCode: 200,
    body: JSON.stringify(metadata)
});
當我們檢查我們的端點時(如果你有一個更漂亮的瀏覽器擴展名)它會返回:
第4步:添加代理路由
在netlify上,我們仍然使用不方便的URL格式/.netlify/functions/metadata?tokenId=666來查看新端點。打開netlify.toml文件並添加一些重寫規則,以便我們可以將一個漂亮的URL /metadata/666轉換為我們的lambda函數可以理解的內容/.netlify/functions/metadata?tokenId=666:
[build]
  functions = "functions"

[[redirects]]
  from = "/metadata/:tokenId"
  to = "/.netlify/functions/metadata?tokenId=:tokenId"
  status = 200
這會將查詢重定向/metadata到該位置的任何內容/.netlify/functions/metadata。該:tokenId佔位符指定的值應結轉到同一位置的其他網址。它應該在標題中返回的狀態200意味著成功。
第5步:添加opensea.io
為了確保我們的元數據顯示在像opensea這樣的網站上,我們希望提供服務理解的格式。該Opensea文檔說,他們想到的是附著在下面的示例中的元數據:
{
  "description": "Friendly OpenSea Creature that enjoys long swims in the ocean.",
  "external_url": "https://openseacreatures.io/3",
  "image": "https://storage.googleapis.com/opensea-prod.appspot.com/puffs/3.png",
  "name": "Dave Starbelly",
  "attributes": [ ... ],
}
使用附加attributes鍵可以填充如下:
{
"attributes": [
    {
      "trait_type": "base",
      "value": "starfish"
    },
    {
      "trait_type": "eyes",
      "value": "big"
    },
    {
      "trait_type": "mouth",
      "value": "surprised"
    },
    {
      "trait_type": "level",
      "value": 5
    },
    {
      "trait_type": "stamina",
      "value": 1.4
    },
    {
      "trait_type": "personality",
      "value": "sad"
    },
    {
      "display_type": "boost_number",
      "trait_type": "aqua_power",
      "value": 40
    },
    {
      "display_type": "boost_percentage",
      "trait_type": "stamina_increase",
      "value": 10
    },
    {
      "display_type": "number",
      "trait_type": "generation",
      "value": 2
    }
  ]
}
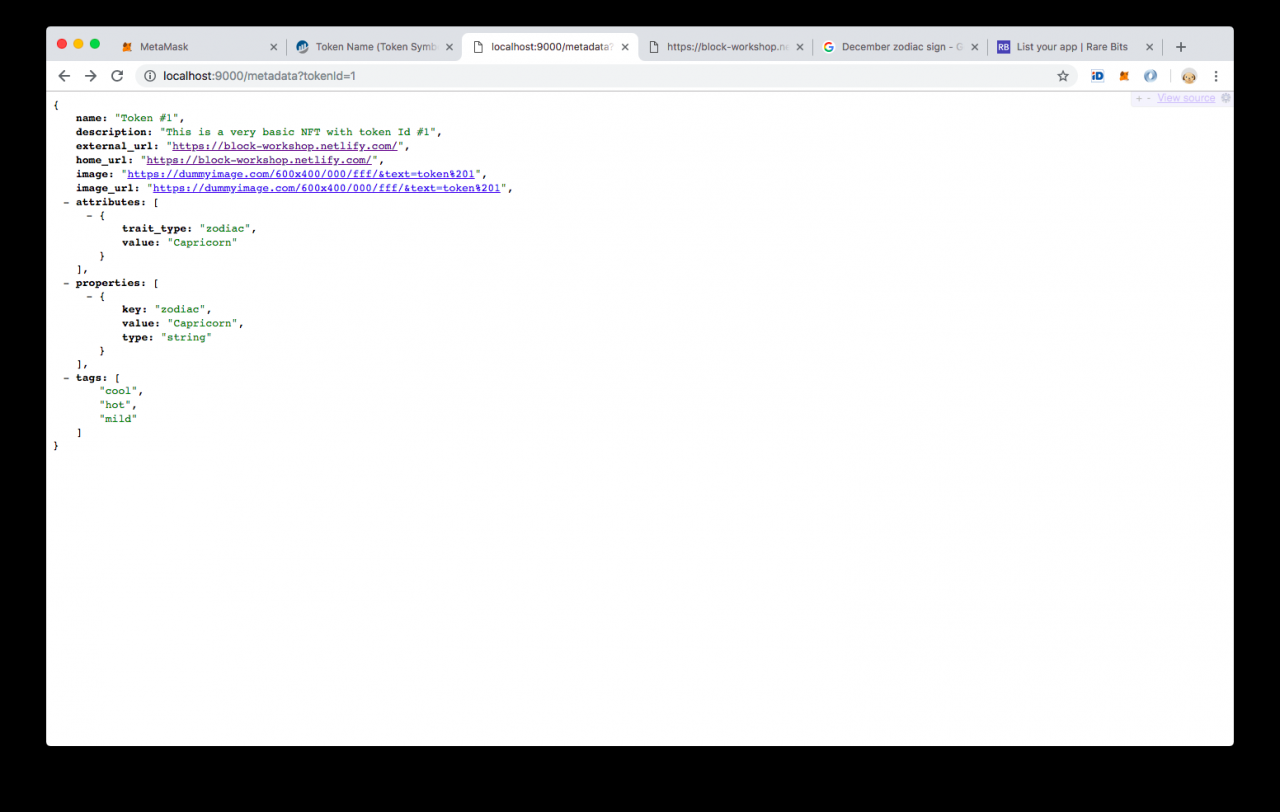
添加一些屬性到我們的端點。也許我們tokenId可以反映一個星座:
exports.handler = function(event, context, callback) {
  const tokenId = event.queryStringParameters.tokenId
  const metadata =  {
    "name": "Token #" + tokenId,
    "external_url": "https://block-workshop.netlify.com/",
    "description": "This is a very basic NFT with token Id #" + tokenId,
    "image": "https://dummyimage.com/600x400/000000/fff/&text=token%20" + tokenId,
    "attributes": [
      {
        "trait_type": "zodiac",
        "value": returnZodiac(tokenId)
      }
    ]
  }
  callback(null, {
    statusCode: 200,
    body: JSON.stringify(metadata)
  });
};
function returnZodiac(tokenId) {
  const month = ((tokenId - 1) % 12) + 1
  switch(month) {
    case(1):
      return 'Capricorn'
    case(2):
      return 'Aquarius'
    case(3):
      return 'Pisces'
    case(4):
      return 'Aries'
    case(5):
      return 'Taurus'
    case(6):
      return 'Gemini'
    case(7):
      return 'Cancer'
    case(8):
      return 'Leo'
    case(9):
      return 'Virgo'
    case(10):
      return 'Libra'
    case(11):
      return 'Scorpio'
    case(12):
      return 'Sagittarius'
  }
}
第6步:添加稀有物
另一個受歡迎的NFT市場是稀有市場。我們也要堅持他們的格式:
{
  "name": "Robot token #14",
  "image_url": "https://www.robotgame.com/images/14.png",
  "home_url": "https://www.robotgame.com/robots/14.html",
  "description": "This is the amazing Robot #14, please buy me!",
  "properties": [
    {"key": "generation", "value": 4, type: "integer"},
    {"key": "cooldown", "value": "slow", type: "string"}
  ],
  "tags": ["red","rare","fire"]
}
你知道什麼它遵循自己的規範您現在可以了解為什麼保持元數據端點的靈活性非常重要。直到我們生活在一個已經確定了每個人都使用的標準並且不在netlify上的lambda函數上託管的世界。
添加信息到我們的令牌,所以它也遵守稀有:
exports.handler = function(event, context, callback) {
  const tokenId = event.queryStringParameters.tokenId
  const metadata =  {

    // both opensea and rarebits
    "name": "Token #" + tokenId,
    "description": "This is a basic NFT with token Id #" + tokenId,

    // opensea
    "external_url": "https://block-workshop.netlify.com/",
    // rarebits
    "home_url": "https://block-workshop.netlify.com/",

    // opensea
    "image": "https://dummyimage.com/600x400/000/fff/&text=token%20" + tokenId,
    // rarebits
    "image_url": "https://dummyimage.com/600x400/000/fff/&text=token%20" + tokenId,

    // opensea
    "attributes": [
      {
        "trait_type": "zodiac",
        "value": returnZodiac(tokenId)
      }
    ],
    // rarebits
    "properties": [
      {"key": "zodiac", "value": returnZodiac(tokenId), type: "string"},
    ],

    // rarebits
    "tags": ["cool","hot","mild"]
  }
  callback(null, {
    statusCode: 200,
    body: JSON.stringify(metadata)
  });
};
現在我們返回了一個胖的json對象。
第7步:重新部署並鑄造令牌
現在我們有一個元數據API端點,我們不需要做任何事情來為它提供服務。我們甚至有一個縮小的網站,並在內容交付網路中播種。我們所缺少的只是我們的令牌。
當我們部署我們的令牌時,我們使用了返回的元數據端點https://domain.com/metadata/{tokenId},但domain.com不是我們的域我們必須更新我們的元數據端點。
值得慶幸的是,我們建立了這種能力和遷移。在Metadata.sol合約內部使用我們的netlify子域更新URI:
function tokenURI(uint _tokenId) public pure returns (string memory _infoUrl) {
    string memory base = "https://block-workshop.netlify.com/metadata/";
    string memory id = uint2str(_tokenId);
    return base.toSlice().concat(id.toSlice());
}
運行遷移,以便僅替換元數據並在合約內部更新:
$truffle migrate --network rinkeby -f 3 --to 3

...

Using network 'rinkeby'.

Running migration: 3_update_metadata.js
  Running step...
  Replacing Metadata...
  ... 0xe596fcf7f20073988c4c57167d19a529b086ddd978ce386bf66485a97f3ad2d9
  Metadata: 0xfb66019e647cec020cf5d1277c81ad463e4574a4
        Metadata deployed at: 0xfb66019e647cec020cf5d1277c81ad463e4574a4
       代幣 deployed at: 0x1170a2c7d4913d399f74ee5270ac65730ff961bf
  ... 0xc3316fa072e84038ee30c360bc70cdc4107d3fcb74780e33e34b0e117e1534aa
Saving successful migration to network...
  ... 0x416630f6fad98eef2f065014c55ac8b43901ef804435b92d4d02f804a7d4c242
Saving artifacts...
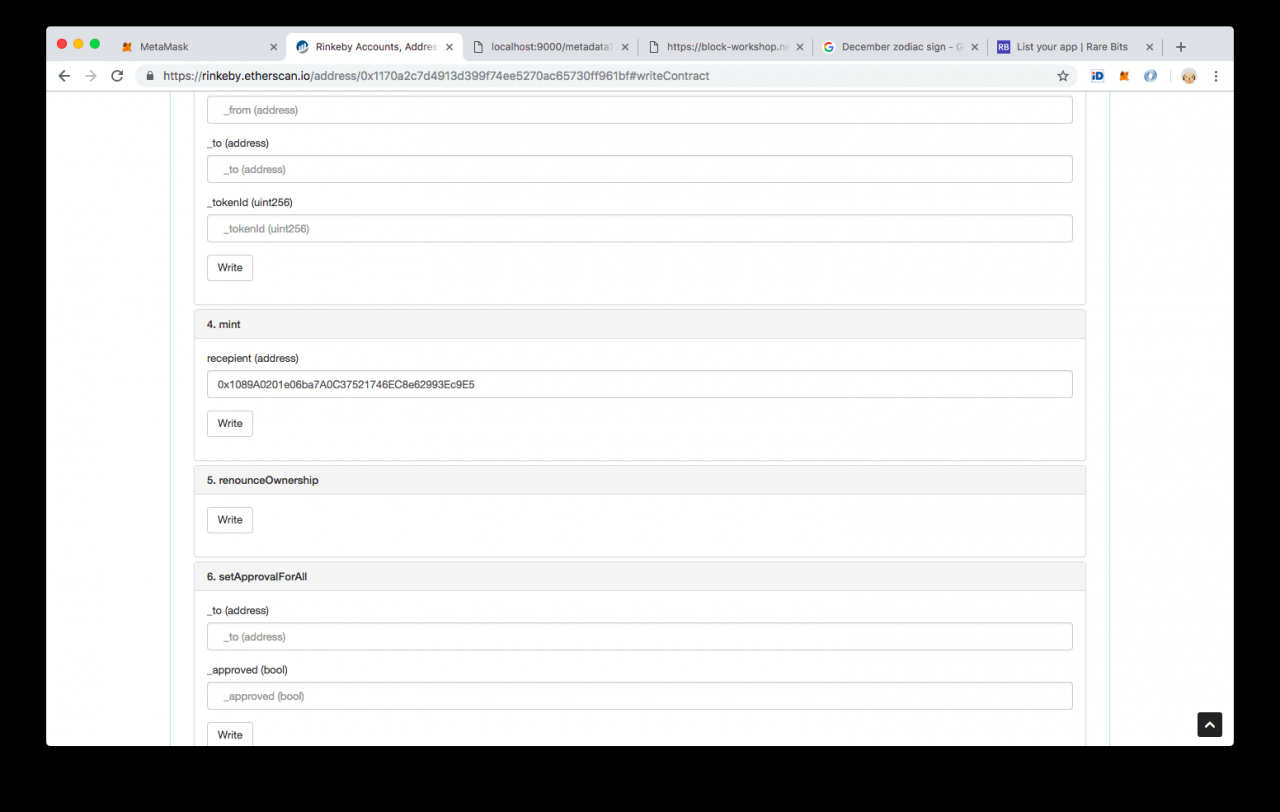
返回我們的etherscan認證令牌並鑄造我們的第一個令牌。您應該看到我們的updateMetadata交易現在列在那裡。
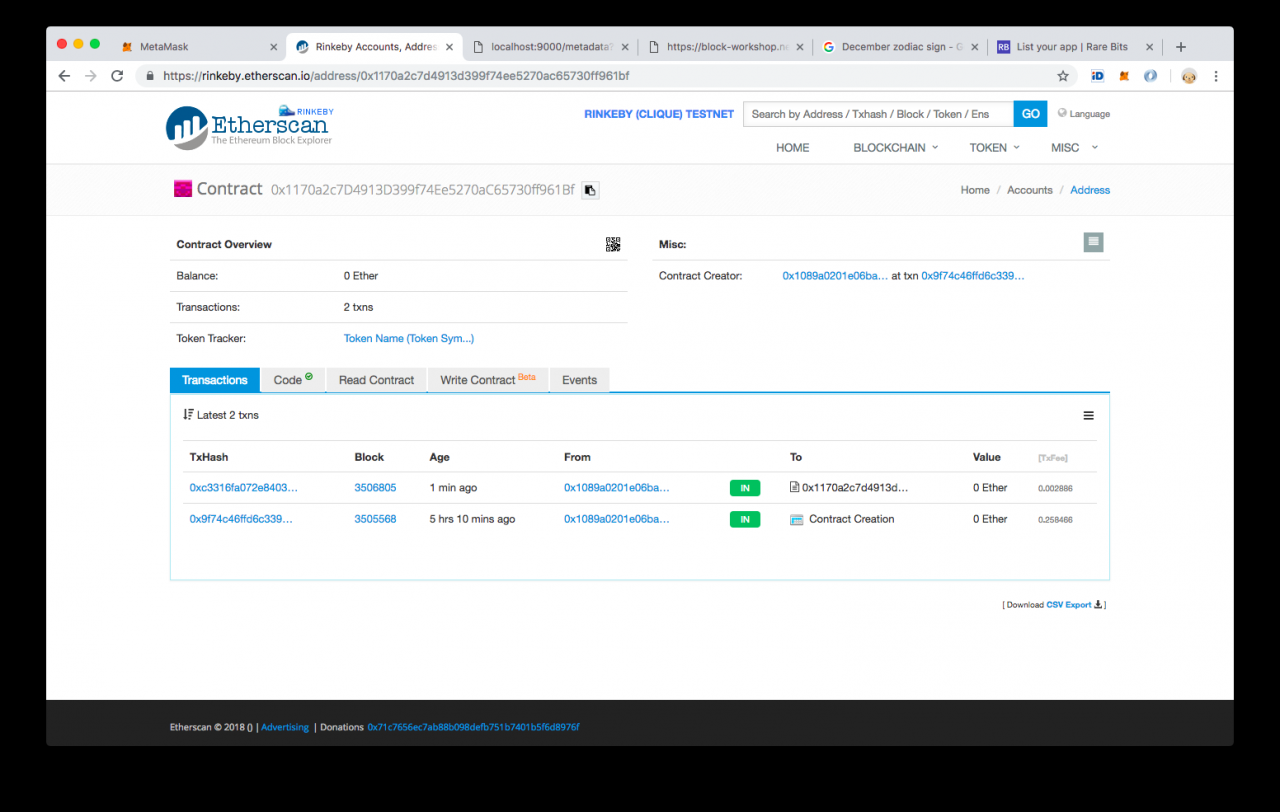
由於我使用的是與我的部署帳戶相同的Metamask帳戶,因此我有許可權制一個令牌。打開寫入合約選項卡,使用Metamask進行身份驗證,並填寫令牌。
由於我添加了自己的地址作為收件人,我應該成為令牌#1的自豪擁有者。我可以使用之前看到的etherscan的標記視圖進行檢查。
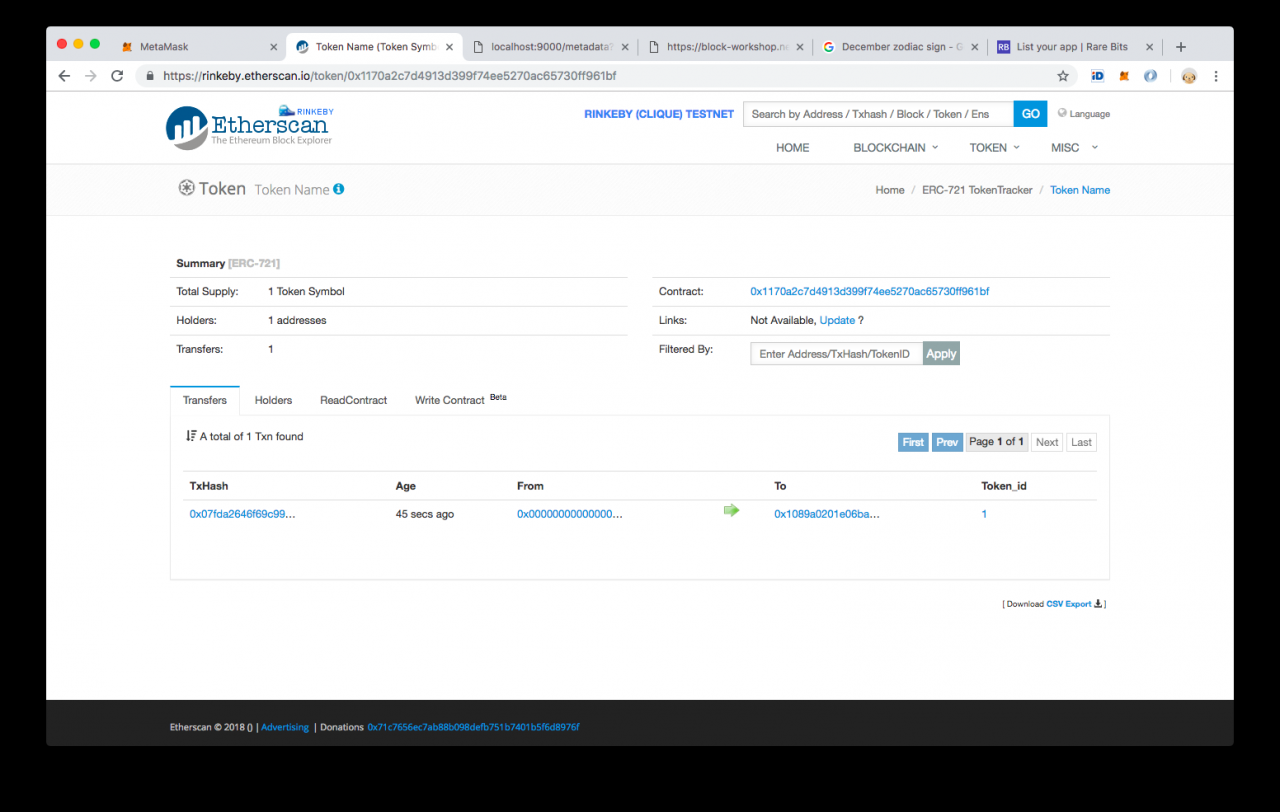
哇,有一個令牌
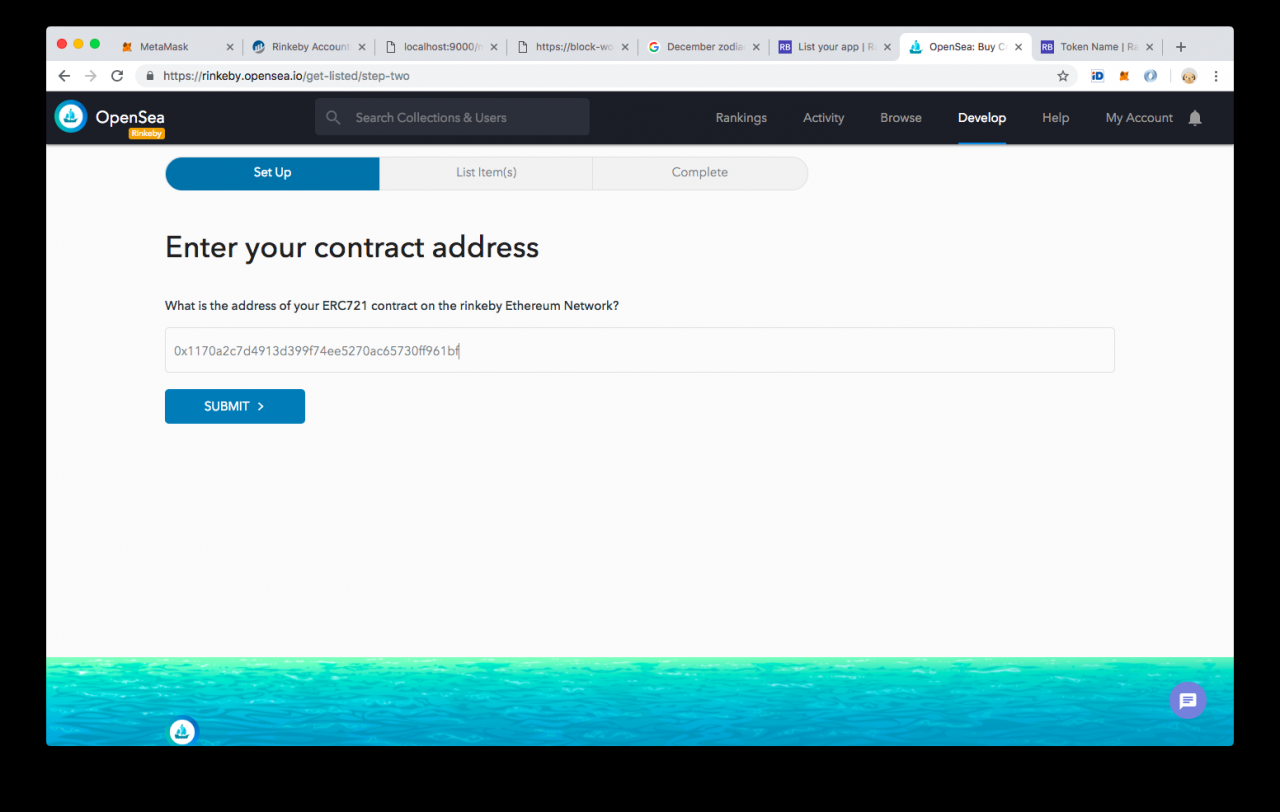
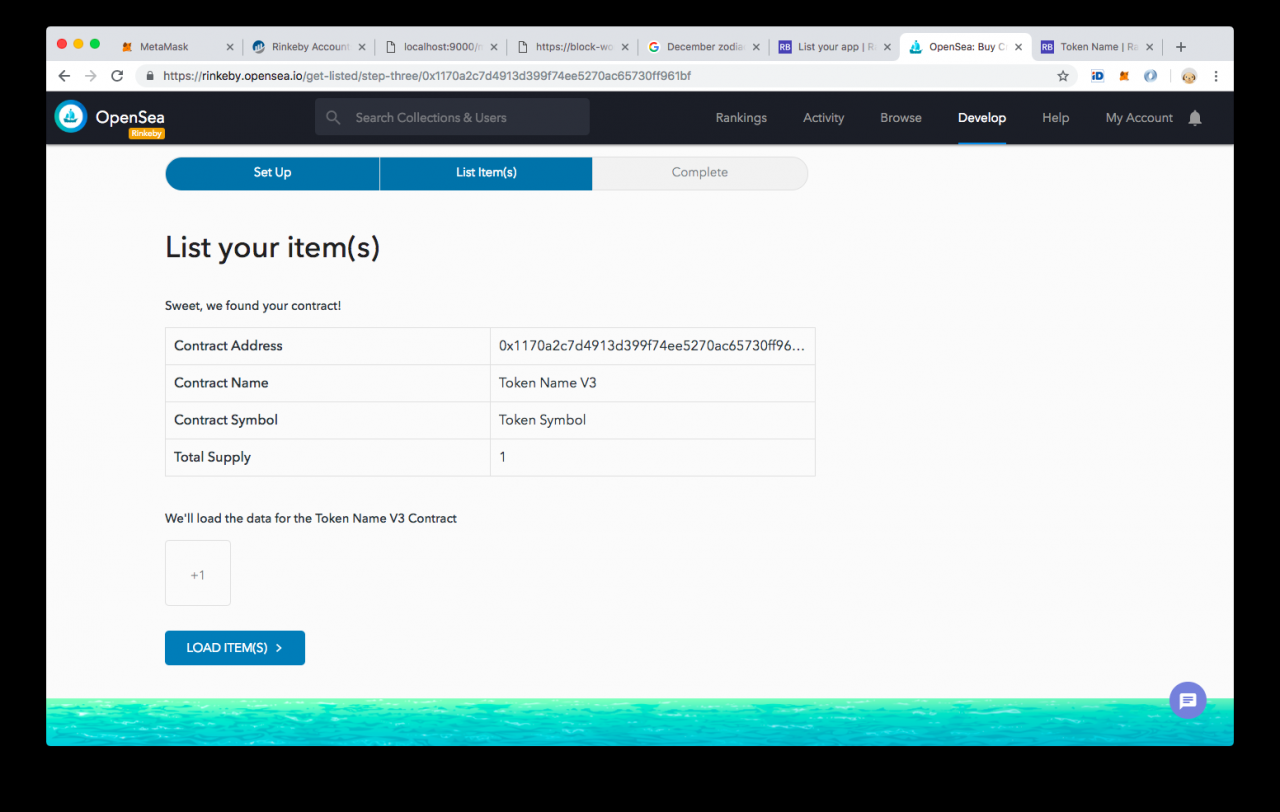
打開opensea,看看他們是否注意到我們存在。對於rarebit和opensea,你必須要求他們在側邊欄顯示之前跟蹤你的令牌,但是你可以通過將合約地址硬編碼到URL來跳過它。了解我們的令牌地址是在0x1170a2c7d4913d399f74ee5270ac65730ff961bf和我們的tokenId就是1我們能夠訪問這樣的URL的rinkeby版本:
https://rinkeby.opensea.io/assets/0x1170a2c7d4913d399f74ee5270ac65730ff961bf/1
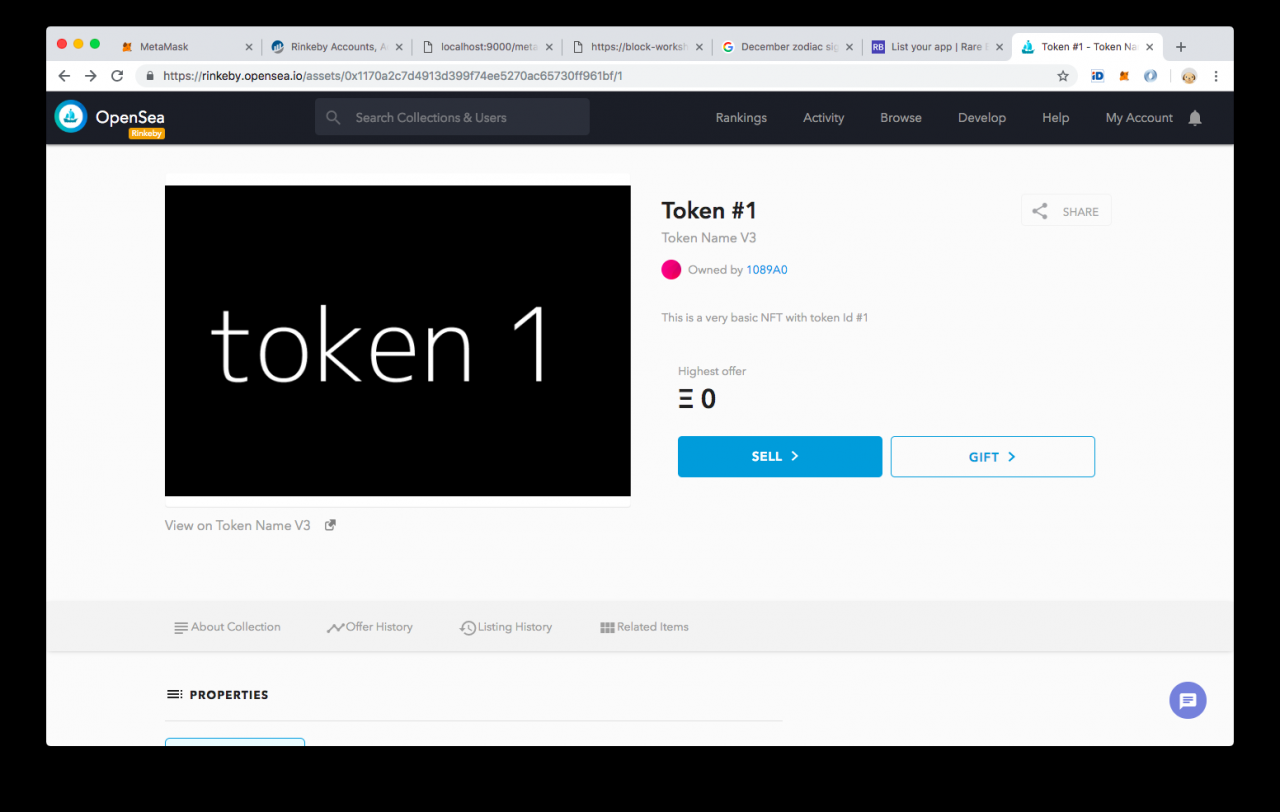
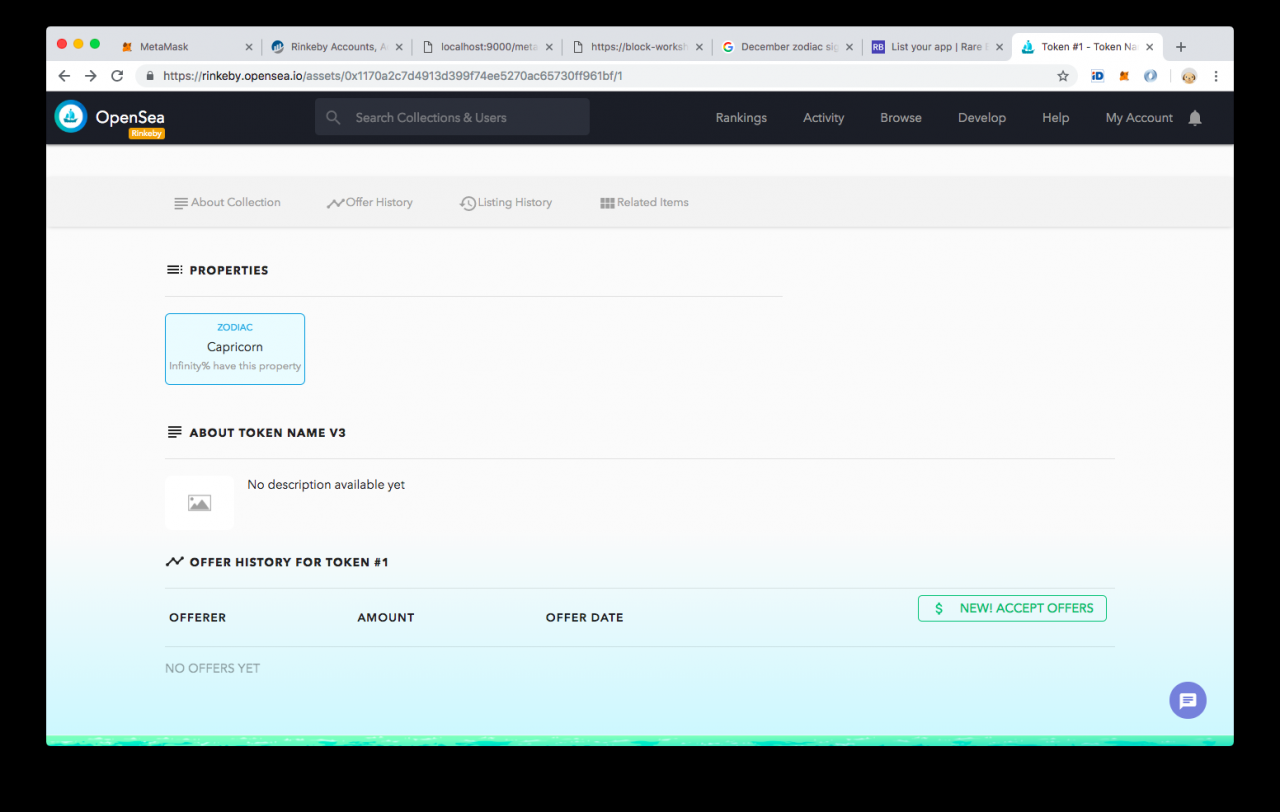
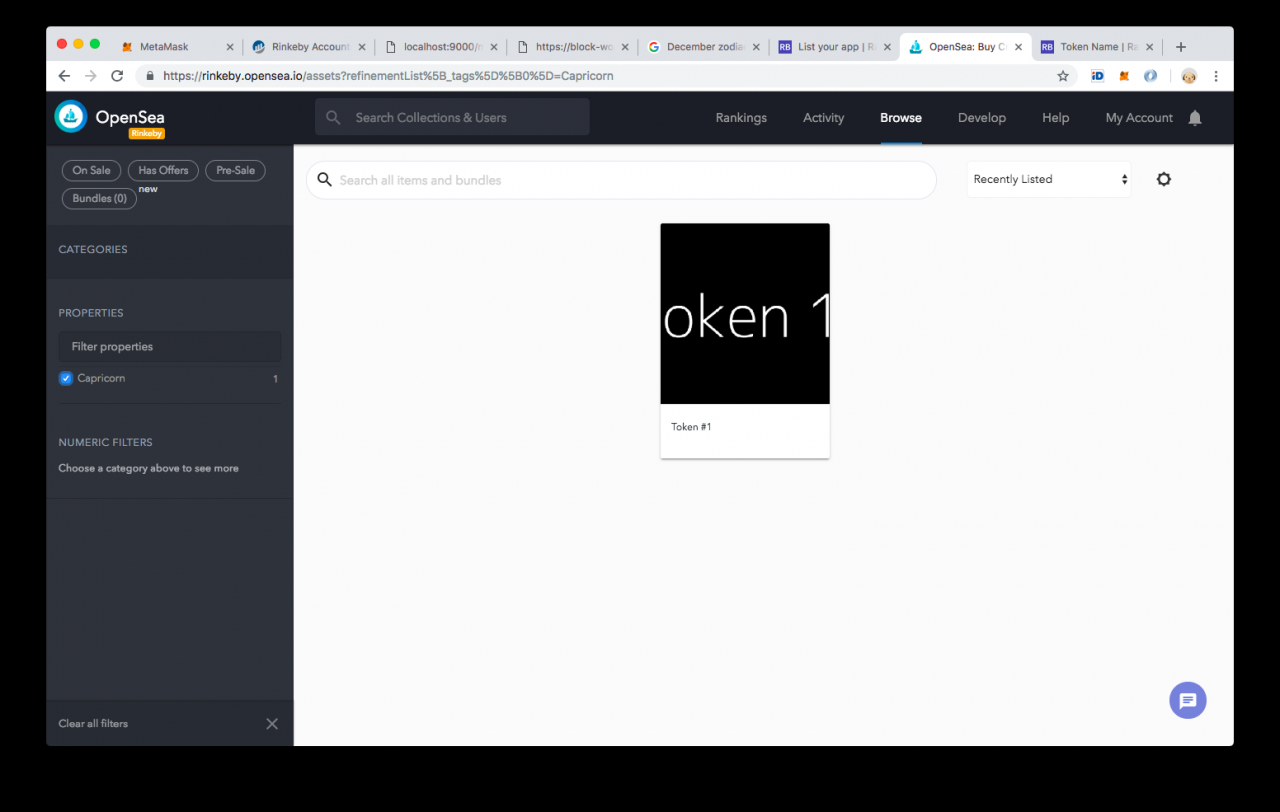
哇,他們甚至知道我們的代幣的星座
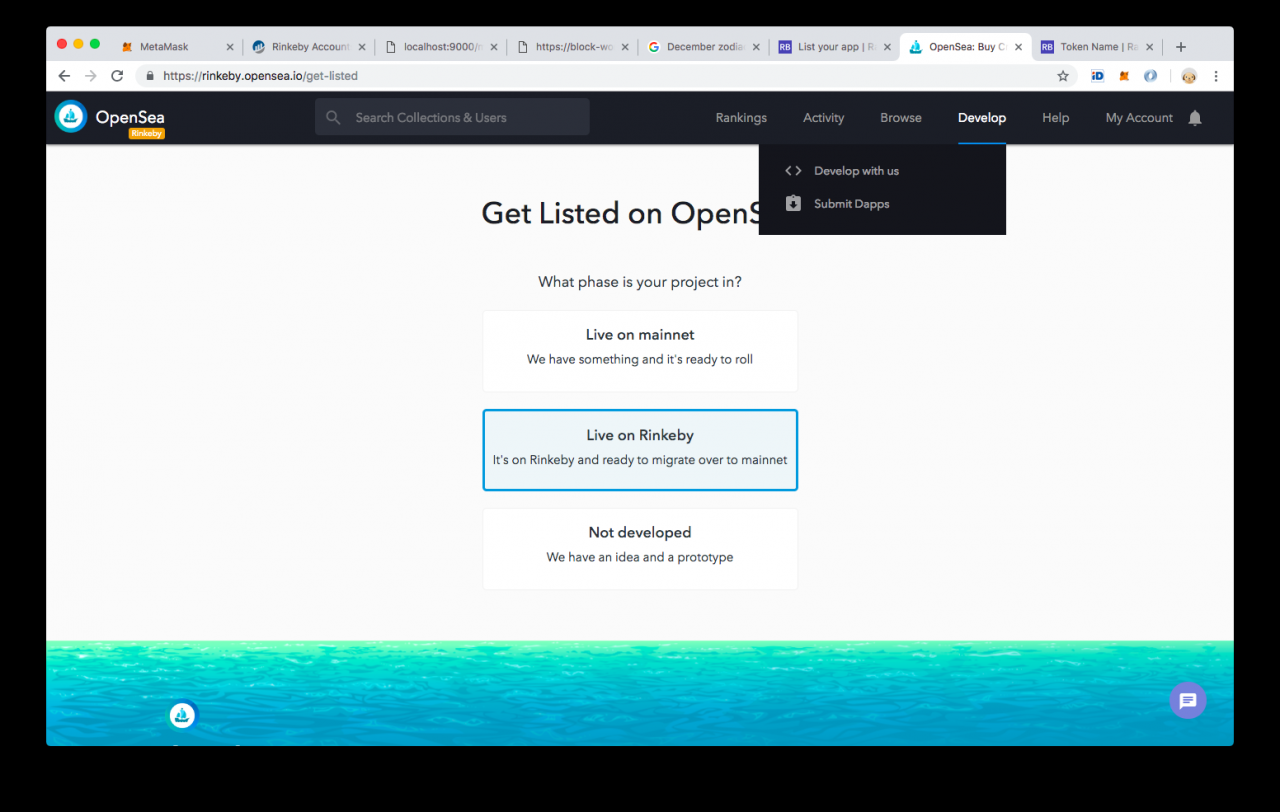
正式添加到應用程序,我們可以在rinkeby部分看到它。
我們起來了
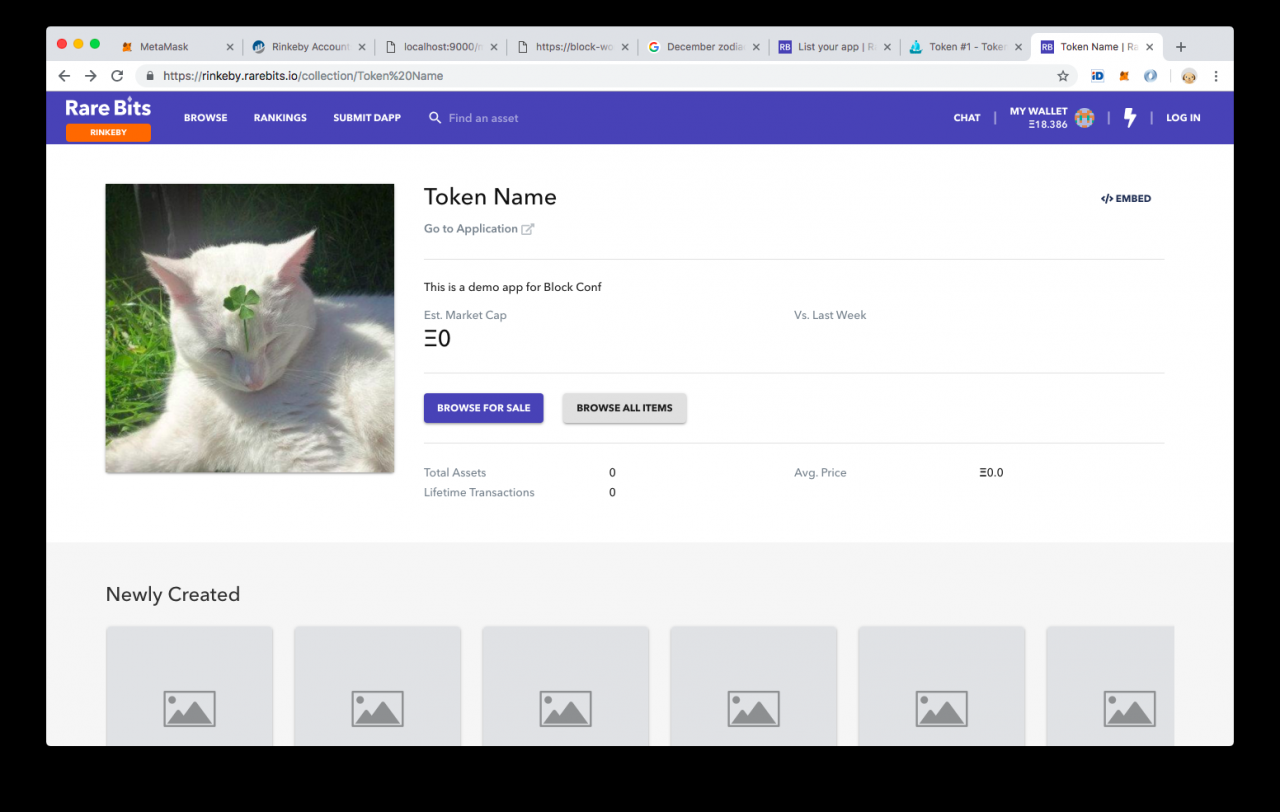
我們也將它添加到稀有。

下一步
- 製作一個更有趣的生成形象
- 一個例子是ENSNifty.com使用的cloudinary的色調旋轉(github鏈接)
- 將資料庫添加到lambda函數以獲取更豐富的元數據
- 獎勵:在推特上開始討論真正的去中心化的意義
原文:https://kauri.io/article/85f570393e1448a7a94e2eab1bae6e48/v2/creating-a-flexible-nft-(part-2)